Step-by-step guide on installing Cartmail on your Shopify store.
Account & Installation Steps #
1. Sign up for a Cartmail account.
- If you don’t have an account, you can sign up by simply entering your email.
2. Login to your Cartmail account.
- If you are having issues, Visit the login page at Cartmail Login and ensure your login works.
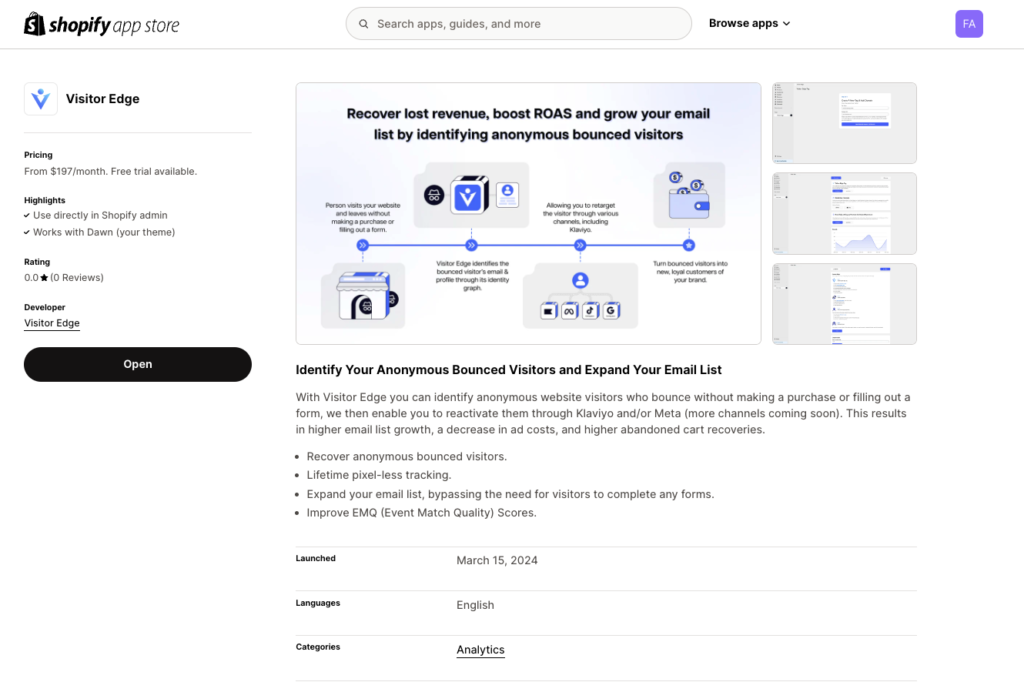
3. Install Cartmail via the Shopify App store
- Go to the Shopify app store and search for “Cartmail”
- Look for “Cartmail” and click “Install” with the free trial.
- Accept the Shopify permissions and privacy terms, and install the app.
4. Complete the Cartmail onboarding/setup flow.
- Now we’ll walk you through the Cartmail onboarding flow.
Creating a Tag & Adding a Domain #
5. Assign a name to your new Tag.
- Enter your root domain name and click “Save Website & Generate DNS Records.”
- Note: Only one root domain is allowed per Tag.
Adding DNS Records & Verifying #
6. Add the generated DNS records to your domain settings.
- You will be given a TXT record and a CNAME record.
- Go to your Domain provider and add these records with the provided values.
- Please wait a few seconds before you check that they have been added. NOTE: This may take a few tries before it detects the DNS records.
7. Verify the DNS records.
- Click on “Verify DNS Records.” Both records must have a green checkmark indicating they are verified and detected on your domain.
Connect Marketing/Activation Channels #
8. Integrate marketing channels: Klaviyo and Meta.
- For Klaviyo, generate a private API key with FULL ACCESS to Events, Lists, Profiles and Metrics.
- Navigate to Klaviyo’s API keys page, create a private key, and copy it to your Activation Settings.
- For Meta, in your Events Manager find your Pixel ID and under Settings scroll down to “Generate an Access Token”.
- Note: You will need those fields filled in to ensure Meta is connected.
- Note: If you signed up via our Cartmail Dashboard and NOT Shopify, then by you authenticating in to Meta, this completes this account connection as well.
Tracking Events in Shopify #
9. Follow the Quick Start Guide for Custom Edge Tag setup.
- You are almost done! A few steps inside of your Shopify store.
- From the Overview tab, follow the instructions to complete the integration.
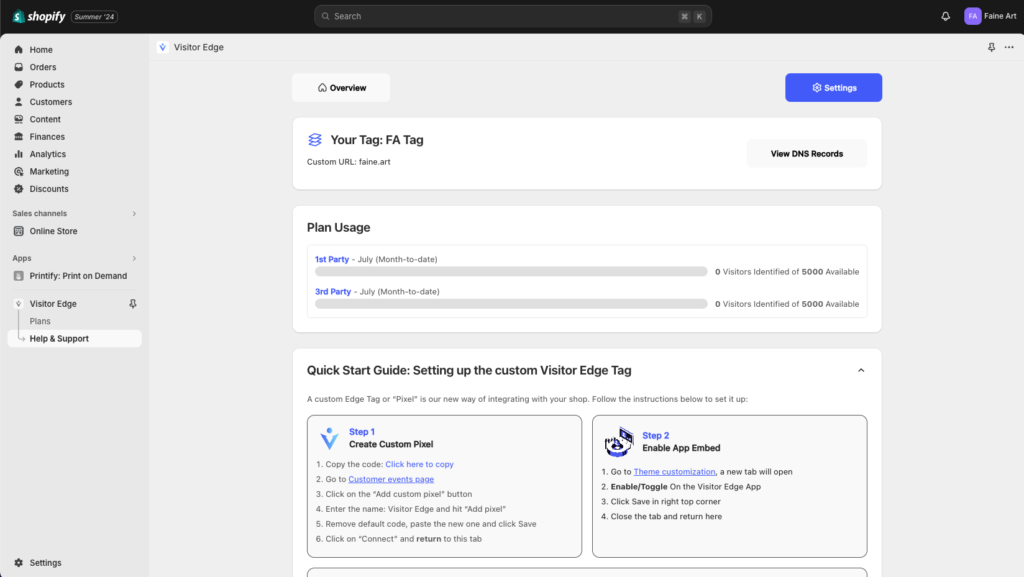
Creating the Custom Visitor Tag #
10. Add the Cartmail Tag to your Shopify store.
- Copy the provided snippet in Step 1 under “Click here to copy”
- Open the Customer Events Page, click on Add Custom Pixel, enter ‘Cartmail Tag’ as the pixel name, and add the pixel.
- Paste the code in the Code section, save, and click Connect.
Enabling App Embed #
11. Enable the Cartmail App in your Shopify Theme customization.
- Open your Shopify’s Theme Customization page.
- Enable the Cartmail app by toggling it ON and Save the changes on the top right corner.
Final Steps #
13. Verify event tracking in Cartmail.
- Ensure events are appearing in your Cartmail Shopify Overview tab under “Events”.
- If you don’t seen events right away, please wait 30 minutes and check again. If there’s still no events then then please contact us via our Slack and we can help you troubleshoot!
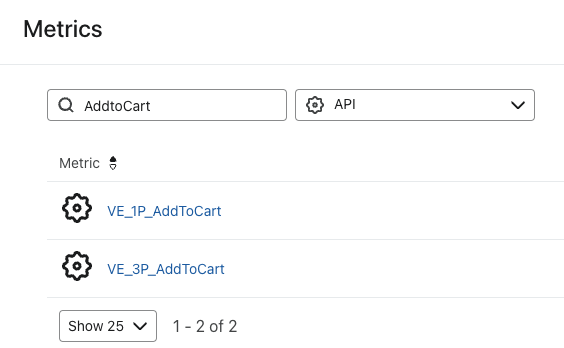
Where to find this data
Inside of Klaviyo under Analytics -> Metrics, you will be able to see new events that have been created by Cartmail’s API. You will see Cartmail events labeled as “VE_3P_AddtoCart” or “VE_1P_AddtoCart”.
Inside of Meta, in your Events Manager, you will be able to see the events named the same way, but they will now start appearing in real-time, at the same time they are sent to Klaviyo.
NOTE: Since our Events are written via API to your Meta Pixel (Dataset), then you may need to manually acknowledge that you recognize those events that are coming from API.
That’s it! 🎉 #
Your Shopify store should now be fully connected to Cartmail, tracking events and ready to integrate with marketing channels. Via our Dashboard, you are able to start filtering your Visitors and creating custom audiences to take even more advantage of our features.


